Showing posts with label family fun. Show all posts

Sunday, October 26, 2014

Emali Early Learning Centre/Recycling Part 4

Hi All,

I've decided to do my next Recycling piece on a local childcare center which my wife, Justine, works at.

They are a big believer of re-using unwanted goods and teaching the kids the value of recycling as opposed to buying something new. Over the course of this article I'll show the ideas they have put added to the centre - due to child protection though I won't be able to show any children in the photos.

So, the centre is called Emali Early Learning Centre which is based out at Broadview, South Australia. The centre is only about a year and a bit old but the staff in charge are extremely experienced and excellent to deal with.

Since my wife has worked there we've had discussions with the Manager, Rachael, about the value and fantastic things you can do with items such as unused Timber Pallets. Now the centre is not only creating new things with Pallets but they have shifted their focus to anything else they can lay their hands on to create new and exciting ideas.


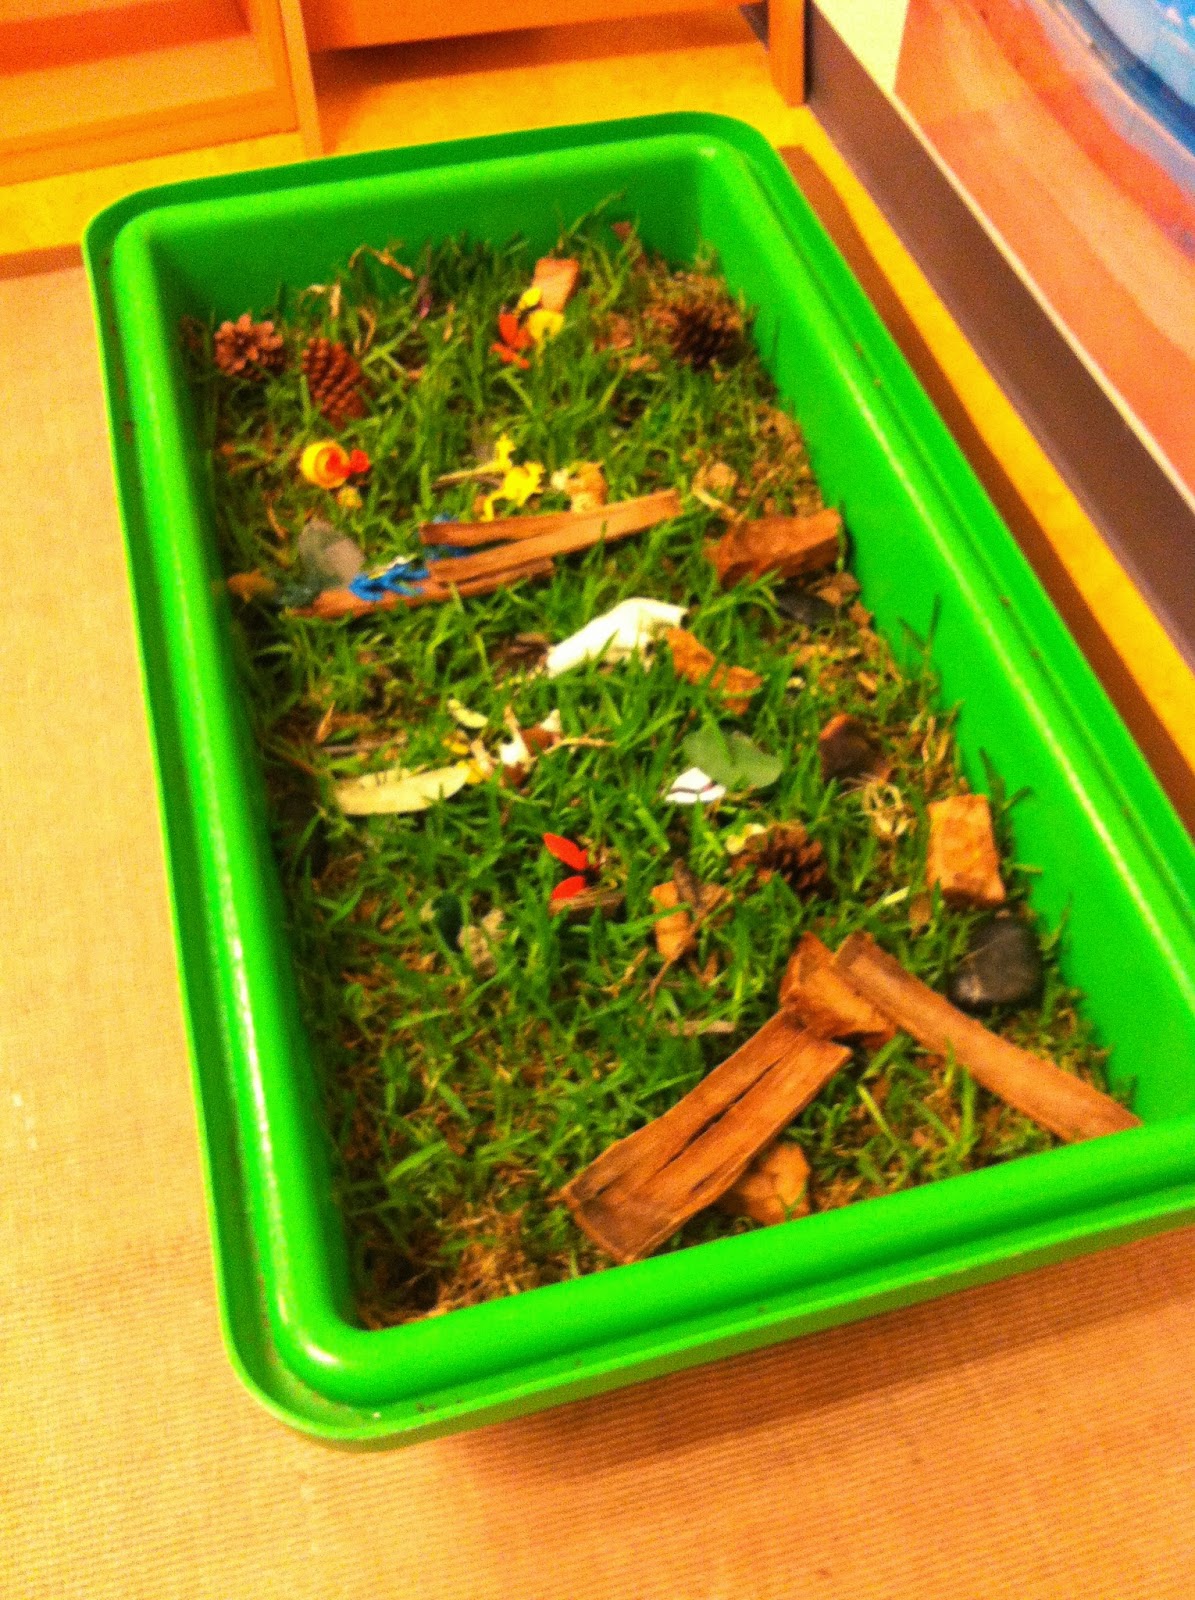
The first photo I just love, and it isn't hard, or cost a heap to do. It's perfect for centre's or even at home!

This is a simple plastic container bought from anywhere like a cheap shop like Cheap as Chips, Reject Shop or even from Bunnings. Buy the longer one that is still relatively deep but with some soil added and the grass the kids can just reach in and play.

The centre basically bought the container, added a good two inches of soil and then bought a patch of grass from Bunnings. They're selling it there at the moment for approx $7 - $10 per patch.

The idea is basic, cost effective and brilliant, it can be used while its bucketing down during winter or too hot to go outside. It teaches the kids about the environment, gets their hands dirty and good thing - they can grab some scissors - cut off as much as they like and it will grow back! Brilliant!!


 Now onto a pallet theme, I love pallets!

This centre is excellent for pallets as they too see there is still life in the old work horse even after its spent years holding stuff like bricks, pavers and other heavy items - yet often to be left discarded on the side of a road!

We love nothing better than picking them up, sanding them back, fixing them up then applying some varnish to give them a new look.

Here's some examples of the pallet work the centre have added as well as some i've helped do. This one to our right is simple - can be used as a table, somewhere to sit or play on yet looks very loved and used alot by the kids!


Here's another example similar to the above photo however for this one, Rachael tidied this one up alot more giving it sides and legs!

This one has come up very nicely and tall enough for the kids to sit with their legs under and punch out some excellent art-work!


This one is simple yet effective, pallets and other recycled items have been thrown together to create an "Insect Hotel"!!

Here the kids can explore and learn about all the bugs our gardens have to offer - on top the centre has also included plants for them to help water!


As I move to the next ideas, Tyres, you'll see in the background some pallets we've bolted to the fence to add extra garden spots for the children to help plant with and water.

Here you can see different sizes and length pallets have been used

You can also see in the left hand side of the photo a "Pallet Boat", nothing major but Rachael added a sail to the base - the kids love it and spend hours pretending their sailing the seven seas!


Tyres, every childcare centre loves them (And if they don't they should!!!) I remember growing up in O'Halloran Hill where our Kindergarten had big massive Tractor Tyres, I used to love playing in them!

Rachael found an advert on Gumtree where someone was giving Truck tyres away for free, a quick phone call and within days the centre had approx 20 tyres of different sizes delivered.

Here you can see they've been added around the centre for the kids to climb, explore or simply sit and have a chat!

The kids can paint or draw on them!


Here a tyre has been added just in front of one of the pallet gardens, children can sit here and have a chat or sit and help plant!


Here's one my talented wife, Justine, came up with, she took some off cuts of pipe laying around in the shed and secured these to the pallet.


Too often these days the world ignores those things which die off yet when given a new life can be used to create wonderful things.

This hanging decoration is just that, using an old metal ring, some string and sticks the centre has created quite an interesting hanging piece.

You can't see in the picture but they have also tied pebbles and glass pebbles with fishing wire for added effect.


I'm extremely proud of this creation, my lovely wife Justine on a recent trek up the Riesling Trail in the Clare Valley collected these large sticks to create a fun and inviting wall decoration outside her children's room.

Using fishing wire and lots of coloured pebbles she as included individual photos of the kids for their parents to see!


The next couple of photos highlight other items businesses take for granted and throw away after use.

These big wheels are normally used for industrial items like wire. I'm not sure of their life expectancy but for kindergartens and child care centres they live on for many decades, the kids love playing on them, climbing etc.

Here just simple, its new use is a table, thrown together with some cut tree logs.

Below are a few more examples, wood or plastic - either will make a great table for the kids to use, rather than spending $100 on a new one!


So this brings me to the end of Part 3 of my Recycling article, I hope the above gives you some ideas for things you can do at home or even at a centre you work at.

It doesn't matter what the item is, there is usually a new home for it. Let your mind think outside the comfort zone and help teach the kids of today that life isn't just brand new things bought from Ikea and local stores. Recycling helps not only the environment but also the youth remember that reducing our carbon footprint will help generation after generation.

Emali Broadview are apart of a new trend of centers with Managers/Directors who are on the look out for this type of Recycling, its fun to do, easy to make and all centers and schools should think of doing this regularly. For more information on Emali you can go to: http://www.emali.com.au/childcare-broadview.html.

Finally it must be noted the work Justine & Rachael do at the centre, on top of their very busy schedules and juggling a very busy centre - they have transformed their ideas from dream to reality and the children are benefiting from this. A very valuable partnership they have and I look forward to watching what else they come up with!!

I'll leave you now with some more examples below of items the centre have either collected or set up and used.

Regards

Tony
Pallet turned Bookshelf!
Wood off-cuts sanded back to now be used as building blocks!
The Storage Area!


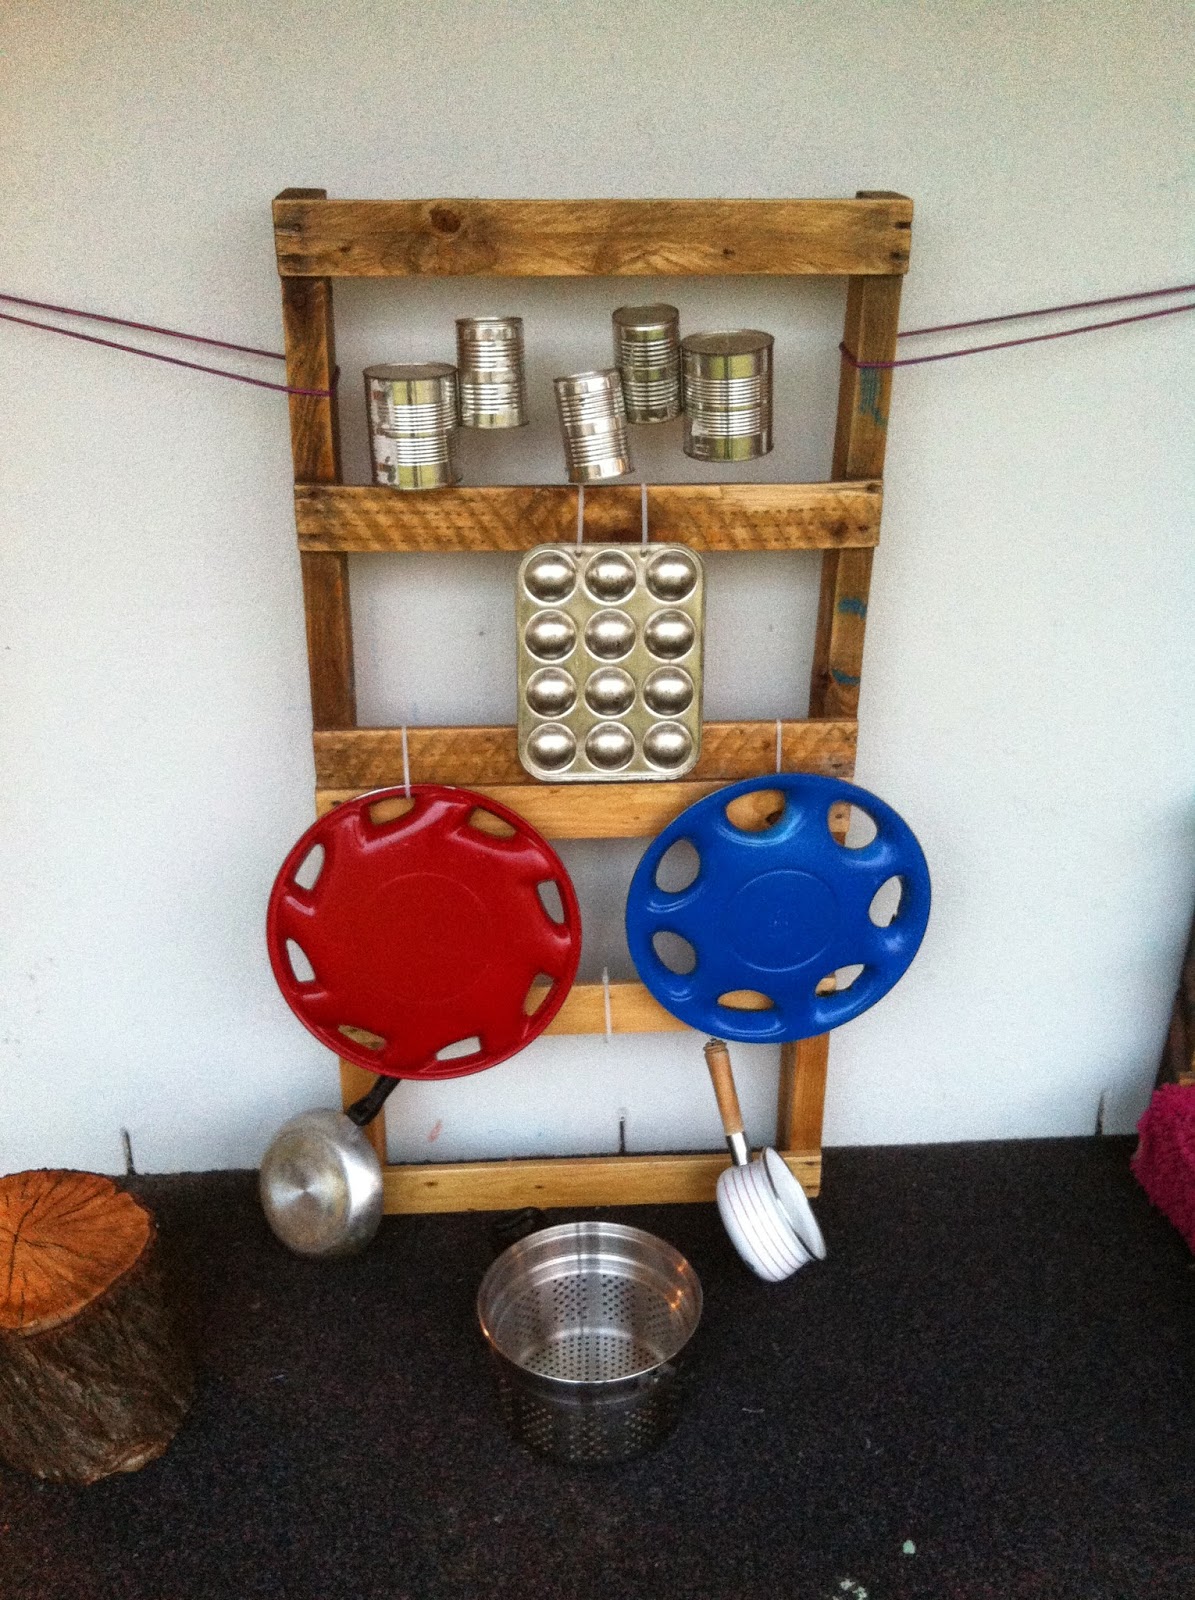
Pallet turned Music Wall!


New Planter Boxes!

Nice area for a quick nap or relax

Sunday, August 3, 2014

Recycling Part 3


Hi All,

Been a while since my last post, sport and work seem to have taken up alot of my time of late.

Last weekend was the first "At Home" one we've had in some time, I wanted to make sure I didn't fall into the old ways of lazy weekend at home so let's jump on the PlayStation.

My wife and her child care centre are really getting behind the concept of building stuff with recycled materials such as timber pallets, so she asked if I wouldn't mind chopping up one of the pallets to be varnished and re-used as book shelving.

No worries at all! This helped me re-discover my old circular saw which has been hidden away for some time - I was delighted to find it still works beautifully! Out of the one pallet you can make 2 shelves, however there is enough left over for you to almost make a third, if you do attempt this it's good if you have a couple of pallets being used for the main task then one or two sitting by for spare parts... I chopped the two and a third up and sanded them down with my orbital sander.

My wife then applied the varnish (2 coats) and they look a million dollars!


Whilst sitting by my bench my wife also noticed a heap of scrap wood which was collecting saw dust, she asked if I could cut it all into different sizes for the kids at her centre to build with. Genius! Why didn't I think of that! So I cut down a heap, I think in total there was about 40 - 50 blocks but enough to fill this lovely bucket. I took the bucket full of cuts with some sandpaper and sanded down all the edges and the sides cut to make sure no nasty splinters for the kids.

Word is they received the bucket today and absolutely love it!


Our next project was to liven up the scrap pile which was semi-made for the chickens to get in, pick about the scraps and help turn a patch of soil into a lushish worm filled plot to be used for a veggie patch or for spare soil.

In one of the big storms we had late last year we lost our timber pergola out back, the storms were quite savage and as such knocked a tree branch right through one of the main parts, Being unable to fix I decided to pull it down and salvage the parts.


I went around to the local Bunnings and bought some metal rods the guys use when laying concrete, drilled a hole at each end of the timber poles and knocked the rod through to secure. That easy, and the best thing, we're utilizing recycled materials.

I then asked my lovely children to each give me a hand and we dug up the plot, turned it all over and planted Potatoes, Parsley, Celery, Brown & Red Onions and Carrots. Not art work but it at least makes this part look a tiny bit better.


Last but not least is an idea I've been keen to try for some time, the Potato Tower!! Using old wood in the shed and poles left over from the pergola I wanted to create the tower to plant potatoes. The theory I've read online is to start them low in the tower, let them grow up, then add more soil as the plant gets tall.


By adding extra soil the plant then generates more potatoes. As this occurs I keep adding extra lines of the wood - thus creating a big tower filled with potatoes!! Here's a photo of the finished product, as you can see I've added two panels at the bottom and one about three up from there - just to provide a bit of stability to the frame.


It is truly amazing the things you can do when you open your mind to the world around, here's a couple of things my wife's child care has done recently.

Here in Adelaide its quite cold and wet whilst we're in the middle of Winter, so the childcare centre brought the lawn inside!!!

My wifes boss at Emali Child Care Centre (Broadview) created this gem by simply getting a container, then heading to Bunnings and buying a strip of pre-grown grass they have turned a boring old container into something the kids can play with and explore their senses by allowing them to touch and feel but also grab the old scissors out and trim it - best thing is, with a bit of water and the kids grooming, it continue to grows!


This probably isn't as exciting as the above but for me, I love it!

This once was an empty section of the room which has now been transformed into somewhere the kids can sit and play/draw, they've converted an old wheel that once held wire/cable and they've also added old tree stumps as chairs! Sanded down so no splinters this gives a lovely new area to sit and chat.


Good Luck and I hope some of you get a chance to try something like above or gain inspiration for recycling items for re-use rather than shoving into the waste!

Regards

Tony

Thursday, March 20, 2014

School Holiday Fun - Adelaide Central Markets

Hi All,

The previous School Holidays arrived with a bang and the kids were busy either heading up to their nanna's for a holiday or at their Vacation Care - my wife also took off a fair bit of time too and whisked the kids away to the local swimming centres or movie's!

We learnt however our local Vacation Care was to be shut for a considerable amount of time over the Xmas break, in fact not re-opening until the 13th of January - which majority of you will understand this is not helpful for working parents...

So we decided I would apply for leave for three of the days in January before the centre opens again to help out.

I was a bit apprehensive of what to do, the obvious was already decided for the Thursday - The Ice Arena at Thebarton - this is a family favourite, my son who is now 10 loves ice skating and is really quite good at it - he was even thinking of taking up Ice Hockey... My daughter who is 6 has only been two times but wow - what a natural! The first time she spent a bit of time on the learners rink but within 20 minutes was pushing for a go on the big rink - she now skates just as well as her brother and is now asking for us to put her in figure skating...

I still had one other day to come up with an idea, the Wednesday.

With a flash of genius I thought, how about a Treasure Hunt! I know I know its a game that has been played for 1000's of years but I couldn't think of a time I'd ever created a hunt from scratch for the kids.

So I decided to take them to one of my favourite places in Adelaide, The Central Market. It is full of everything food wise you could hope for - and and awesome chance to teach the kids a bit about unusual foods which they've never seen or tasted before.

For a while there a friend and I would walk to the markets at least once a week on our lunch break, takes about 5 minutes to walk there - we don't always buy stuff but its just fun to walk through and look at all the different fruit, small goods and seafood mustered in one building!

So I printed off a Map which was available on the Central Markets website: http://www.adelaidecentralmarket.com.au/map/

The thing I love about this website is the detail they've included, very professional site. For example, click on the above link and it will give you a map of the markets, best thing is - you can hover over each stall and it will highlight and let you know the name of the stall holder, if you want more information including some photos click on the stall and it will take you to a mini intro for the stall holder.

Ok I'm getting excited, for locals its probably not as used but for tourists and visitors this is perfect for someone researching a trip to the markets for the first time, or even to work out where they bought an item they loved on their first or second trip and can't remember who it was!!

I started coming up with a list of ideas and items the kids could hunt for, sure its easy to give them a shopping list and say go but where is the fun in that? One of the main aims for me was to get them to work together to get the job done, most parents will agree siblings don't always see eye to eye nor always prefer to work with each other to get the job done...

Ideas came flooding in as I remembered stalls as we walked through them, such as mud crabs, macaroons, pig's heads (i know grose..) and all the exotic fruit we've often walked past and thought "wonder what that taste's like".

So I came up with this:

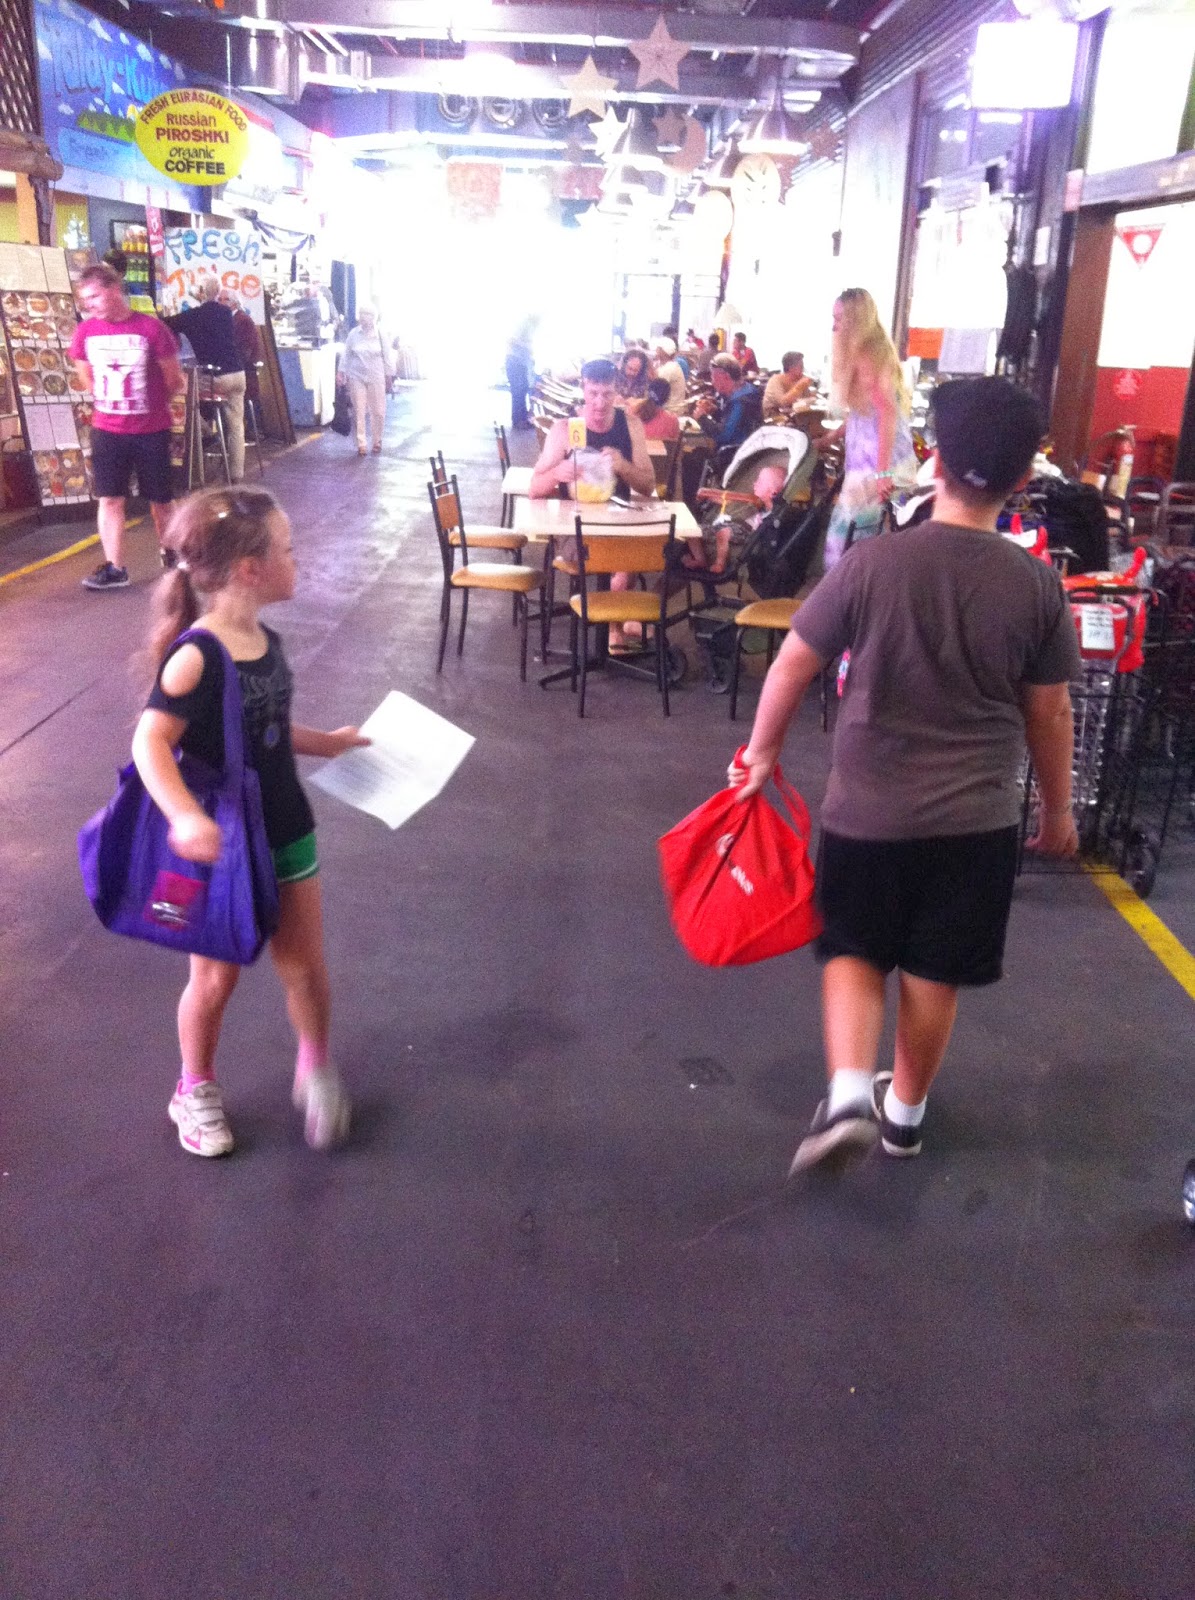
The night before I charged their cameras, had a bag and a water bottle ready and put in their bag a Map each and Hunt Questions.

I told them on the way to the markets where we were going and what we were up for and gave them each a chance to look over the questions - instructions were though, no discussing before we get there. The Questions were loaded with cryptic messages packed in with Dares and photos required.

The kids were quite enthusiastic and we began our hunt well, the Minion Banana question was quite easy, I should have watched Despicable Me 2 first... But easy ones thrown in are good as some were quite difficult.

Most parents will say they have smart kids, I'm the same, we have somehow combined to create two of the smartest kids around, sometimes can be lazy but what kids aren't! I wanted them to use their brilliant minds to problem solve. Worked well - almost too well, most of the ones I expected to be hard even for an adult the two were knocking them off in quick succession..

Tragedy though, the famed Pigs Head which is usually at O'Connell Meats was not there.... Every time I walk through the markets there is a pigs head proudly displayed in the window - someone buys one each time, not sure I would but its funny to look at. The dare for this was the kids to take a selfie with the pigs head - something their mum would not be too keen on haha.

Sadly there were no Mud Crabs either, not sure if out of season or what but like the pigs head, mud crabs are prominent each time we go to the markets.

To top it off the awesome macaroons I planned to get the kids to try were all out of stock in the first isle, but we still managed to try some at another shop near the coles.
Somehow, my family is no big fan of seafood, yet I absolutely love it... so getting them enthused with some of the riddles involving them going into the fish markets were hard at first due to the "fishy" smell "dad!"... but once we headed around to Samtass Seafoods that all changed, so much better presented and that fishy smell my youngest was complaining about was completely absent. Here they managed to find the famed nanigui, or Red Snapper as its also known as. They were both fascinated by the rich red colour of the fish but also its massive eyes - they each took a photo for their album and we pushed on. A quick "who wants to try an oyster" didn't go down well as they both proceeded to bolt out of the shop.

In all I think we all had a great day, although my boy isn't a massive fruit and veg fan he still had fun learning new things and exploring the markets - hopefully experiences like this will help his phobia of good foods. My little one is the opposite and loved the markets too - it was a good family experience and a nice way to kill 3 or 4 hours!

Hindsight I think I should have not given them all the questions before we got there, I think if we do this again I might print off the questions individually then give them once each one has been answered - this way they both have to read it together and not have it pre-known in their minds before they arrive.

I encourage anyone with children, and, who is keen on fresh produce and teaching the kids new things to give this a go - head to the Central Markets Website (http://www.adelaidecentralmarket.com.au/map/), print off a map and start exploring. You don't have to even make it based around riddles - just go up and down all the lanes!

If you do attempt it with your children I would suggest though to add little ideas like the quiz or even a list of stuff they have to find so you can buy - if not that amount of time they may get a little ratty by the end :)
Please if you do try this please comment and let me know your experience!

Monday, September 2, 2013

Richmond Tigers - Rounds 22 - 23

Hi All,

Well I intended on seperate articles for the two rounds however was very sick last week with the flu and barely moved from the couch at all...

Lets get started with Round 22 with the trip to Sydney to tackle GWS:

Shameful to say this I was a little worried heading to GWS for this game, not sure why in the end but thought geez we could be in danger - 2 and a bit hours later I knew that was a complete laugh. Actually prob 40 minutes in...

I was really pleased to see Aaron Edwards get another chance, he is a real force to have on our side as the third scoring option - I think he needs to be a regular if we are to be a team to go further in the finals than just the first round.

GWS to their credit started well getting some good score on the board early, but that was about it for the rest of the game, a good start and then fell apart from there.

Jeremy Cameron is touted as one of the best forwards in the game, only young too, any team in their right mind would go for him - I really hope he's a Tiger one day! Sitting not far from the potential Coleman Medal - Alex Rance has his work cut out for him.

By quarter time the Tigers held the lead by 10 points but the signs were there they were about to unleash.

And Unleash they did! They massed a huge 11 goal term for the 2nd quarter with Aaron Edwards amongst the goal kickers as the Tigers pushed out to an 80 point lead.

GWS put on 3 goals during the 3rd quarter but it was by far not enough as the Tigers added another 10 goals in the last half to secure a 121 point win, one of their biggest and best. Ok its against GWS but it was the way the Tigers controlled the ball in every area of the ground that was the noticeable factor.

Alex Rance was superb down back keeping one of the Coleman favourites goalless, Troy Chaplin was his partner in crime taking many marks down back and rebounding nicely. Dusty Martin, off the back of one of his worst games as a Tiger put in a real solid effort and for most was best on ground, Ellis and Conca were great in patches.

For me it was the emergence of Aaron Edwards, 5 goals but looked ominous up forward - as I said earlier, he will be a great addition heading into finals.

Cotch was subbed off in the 3rd quarter which was a wise move, why risk the captain when we are so far infront...

Best for me was Rance, Martin, Conca & Edwards

Really, most will agree, the Tigers weren't in full flight, most of the time they moved the ball around slowly like a training drill. It looked very half pace at times as they moved the ball with ease - almost resembling a circle work drill we do at trainings!

Final Scores:

GREATER WESTERN SYDNEY 3.0 3.1 6.4 6.6 (42)

RICHMOND 4.4 15.9 19.10 25.13 (163)

GOALS

Greater Western Sydney: Jaksch, Greene, Sumner, Shiel, Scully, Adams

Richmond: A.Edwards 5, Conca 3, Ellis 3, Vickery 2, Houli 2, Grigg 2, Maric 2, Petterd 2, Morris, Riewoldt, S.Edwards, King

BEST

Greater Western Sydney: Adams, Scully, Shiel, Tomlinson

Richmond: Martin, Conca, Grigg, Houli, Maric, Edwards, Rance, Chaplin, Vickery

INJURIES

Greater Western Sydney: Liam Sumner (Achilles)

Richmond: Nil

Official crowd: 12,314 at Skoda Stadium


Round 23 - Richmond v Essendon
This week the Tigers took on the much talked about Essendon team, the Bombers are satcherated in the media and everything social media with the Drugs controversy, In the end the AFL handed down a rather small punishment compared to what most were expecting.

No finals, $2m fine and some other small smacks over the backside. Hird is out for 12 months but in true AFL fashion they went soft, allowing him to coach if they make the finals in 2014. Noticeable thing was Hird is not banned from the club like they did to Trigg from the Crows.

What annoys me is Watson retained his Brownlow despite his admissions and the fact the AFL had evidence of the drugs used the year he won it. To me, he should have been stripped.

Demetriou's involvement too seems to have been whiped clean as the head with his exorborant salary gets out of jail, one might think the early plea allowed him to miss any information being released should it all go to court... Early acceptance by the Bombers looks to have kept him in his job, despite the poor performance he has had since his early tenure.

Ok enough of the Bombers and the sad state they are in.

Tigers were favourites which for me was suprising considering the Tigers were easing their way towards September and the Bombers still had alot to play for, respect.

But from the start of the game the Tigers controlled the ball, adding early goals and capitalising on poor turnovers and kicking for goal by Essendon, one missing from inside the goal square...

The Tigers however did enough to control the game and take charge in their way, not the Bombers. However the controlling environment made it for a scrappy event with the scoreboard not ticking over as much as the crowd anticipated.

The game opened up in the 3rd with the Tigers kicking 6 goals to the Bombers reply of only 3, the big winner though was Daniel Jackson and Dusty Martin, they were both fantastic in the 3rd amassing possessions and dominating their opposition players.

The third quarter also brought in the crowd favourite, Shane Tuck, who earlier had announced his retirement of AFL, hopefully this was his decision and not the clubs as Tucky, in my mind, could play another 2 years easily! He has been a favourite of our house for some time and all the supporters love him.


Over the coming weeks I'm going to put together a piece on Shane - also what he meant to my boy Noah!

The loss however was the hamstring injury of Matt White, Matty has his favourites in the Tiger army and he's had his doubters, I'll admit - I was one of the doubters at the start of the year and even suggested he should be trade. I'm happy to admit when I'm wrong.

Vickery was instrumental in the 3rd bagging three goals and really making problems up forward, it's good to see his is showing his value as alot of Tiger supporters around the traps tout him as the next Brad Ottens and one of our key players for the future.

With the siren going the Tigers went to the three quarter time huddle with a nice lead of 37 points, should probably be up by more though..

Being up by 37 I half expected the Tigers to apply the brakes and cruise to a victory but there was still a bit of fight left in both teams, Daniel Jackson and Jake King being the instigators, Jacko copping a knock from Melsham and the claret began to spill.

Edwards knocked in his 4th for the game giving him 9 in the last two games, lets hope this is enough to see him in the game against Carlton!

All in all it was a great game, Tigers, who most of us wouldn't have been dissapointed with the loss, came out on top by 39 Points. Edwards & Vickery were superb up forward kicking 4 a piece, whilst no Riewoldt.. Brandon Ellis was again showing how far he's come this year racking up 35 disposals, Jacko, who alot tip will be the Tiger Best & Fairest this year was also extremly valuable with 30 disposals and 2 great goals! Cotch, Martin & Deledio were all great collecting in the high 20's for disposals but were also instrumental in the midfield domination.

ESSENDON     2.4   3.6      5.8      9.11  (65)
RICHMOND      4.1   5.6   11.9    15.14 (104)

GOALS
Essendon:
Melksham 2, Jetta 2, Hurley 2, Lovett-Murray, Howlett, Dalgleish
Richmond: Vickery 4, A. Edwards 4, Jackson 2, King 2, Martin, Grigg, Tuck

BEST
Essendon:
Melksham, Hurley, Stanton, Hibberd, Lovett-Murray
Richmond: Jackson, Ellis, A. Edwards, Vickery, Martin
Official crowd: 60,979 at the MCG

Well, we now look to our first Final in 12 years, as I write this now the shivers down my spine, slight tear in the eye and nerves as we prepare for Carlton on Sunday at the home of football, the MCG.

Crowd expecting to be above 90,000 and near capacity, here's hoping the Tiger Army is in full roar and the weather god's bless us with a beautiful sunny afternoon!

Saturday, August 17, 2013

Sustainability & Recycling Ideas

Hi All,

Well recently I started looking at different ways our family can work with the environment rather than always buying new things to use!
I stumbled upon this website while surfing via Facebook: http://lifeonthebalcony.com/how-to-turn-a-pallet-into-a-garden/

The owner of the site, Fern, shows some really interesting ideas for re-using items as simple as an old timber pallet and turning it into a real garden feature!

Please check her website out as I can take no credit for this idea, this article is more so to bring awareness to the idea and demonstrate how my family and I created our pallet!

Heres a list of things you'll need to get your pallet going:

1 Timber Pallet
1 Roll of Weed Matt
1 Roll of Sandpaper (Medium course)
1 Staple Gun with plenty of staples
5 Bags of 25L soil
10 - 15 punnets of plants


So, Step 1 is basically get your hands on a timber pallet, there are usually heaps lying around in nearly every suburb you drive through. I noticed this morning nearly all businesses have a pile out the back and you will also find one or two out the front of houses if someone has recently renovated...


Try and find a nice one but if possible one which has thinner wood than most heavy duty ones, you'll thank me later as the weight of these once soil added is huge!


Step 2, once you've lugged it home you need to nicen it up a bit with a solid sanding, my view on this one was the idea that little children can be involved so try and round off the edges, sand back any bits sticking out that could give off some nasty splinters and fix up any big bits that have come off.


Step 3, this bits easier, take out the weed matt and place it over the pallet, have enough extra on the sides as this can either be doubled up or trimmed off later. For extra durabilty we decided to double ours up on the edges just to make sure.

Once you've stapled them in, just run over all the staples with a hammer to make sure they're all in fully!


Step 4, lay down the pallet and proceed to add fill with soil, remember you need to make sure you pack soil at the bottom and top of each railing, pack it in really tight once plants are added to ensure the soil doesn't all drop out.


Step 5, the fun part! With the soil already added part the middle of each row to create a channel for you to add the plants, for ours, we managed to get our hands on super cheap punnets of flowers for only $1.50 each so we ended up buying 24 of them which helped give it an already established look.


Step 6, once the plants have been added now pay particular attention to filling the gaps up with soil, with a spare mini bucket add clumps of soil around the outside and inbetween plants and press it in firmly - this will help ensure that the plants and soil don't dislodge when you stand it up.


Step 7, give your new plants/pallet garden a thorough drenching! New plants love a big drink once they've been added to new soil and new surroundings so fill the water container up 3 or 4 times and drench it!


Now Step 8 is really up to you when you do it, stand up your pallet and attach to wall via bolts/brackets if thats how you intend to use it.

Myself, and I believe Fern via her website did also, couldn't resist and stood ours up not long after the drenching - I was too eager to see how it looks..

Must say, the sheer weight of my pallet was immense and I struggled to move it against our shed! So make sure you have two people to move the pallet and help you secure it.

I found this to be a really enjoyable little venture, it was fun to do and the kids loved helping too! This is a really family friendly thing you can do, it not only gets the kids outdoors and active but teaches them to think outside the square and see what you can create out of items which are usually discarded!

My boy Noah helped me throughout the whole process, my younger daughter Mia more so got involved with the planting side. I think this is a great venture schools and childcare centres should look to adopt, my only concern with it is the weight, so if anyone out there is considering doing this please make careful consideration to how you will use it after its finished. If its to be a feature against a wall standing up you must look at bolting it or some other way to ensure this can't fall over - the sheer weight would seriously harm a child or kill them if it landed on them! I'm definately no expert in this side of things so would consult a tradey or even pop down to your local Bunnings as i'm sure their team of experts will guide you!

Mine is placed nicely on a slant, my kids are big enough now to know not to climb or pull it over however I wouldn't recommend every do this if kids under the age of 6 are present..

With that in mind I still think this is a great, fun, environmentally friendly venture anyone can do! The pallet can be loaded with your favourite plants, or, whack a heap of herbs and veggies in there to grow fresh consumables!


Here's a list of the plants I used in the trenches:

Pansy
  • Pussycat
  • Masterpiece
  • Caribbean Sunrise
  • Priscilla
  • Breaking Dawn
Viola
  • Space Crystals
  • Harbour Lights
  • Babyface

Dianthus - Gemfire

Once it was stood up and against the shed I originally just had some potts sitting on the top as I was experiencing soil loss on the top level, I found some gutter mesh I had left over in the shed so added that to see if this would stop the soil running and dropping out - worked a treat!

So with the soil now sitting nicely I added some Brussel Sprouts, Snow Pea and a couple of other small flowering plants (Can't remember their names...). With any luck we will get some yummy sprouts!

The first pallet cost me approx $60 but some of the items such as Weed Matt, Sandpaper and Staple gun can be used for multiple pallets - i'm hoping to get around 3 more pallets out of the initial purchase.

Give it a go and please share your experience and if you rate this as a good venture to do or get your children involved with! The beauty of the pallet transformation is you don't have to stand it up! This can also be used as a new veggie patch laying down instead of digging out one and fencing it off!